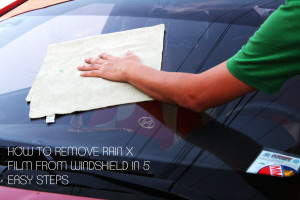
After using the Rain X Windshield Repair Kit to fix your cracks and chips, sometimes residue resin leaves a film on the windshield or car window surface. It is just as important to know how to remove Rain X film from your windshield as it is important to know how to apply it. Here are five quick and easy steps that will teach you how to remove Rain X film from your windshield or car windows. They do not require a lot of time, money or material. The process is so simple that anyone can do it.
 How to Remove Rain X Film from Windshield
Step 1 – Clean Your Windshield/Car Window
Ensure that your windshield’s surface is clean by dusting it with a dry rag. This will remove all dust and other foreign objects that might be on the windshield. After you have dusted, use a wet rag and a mild detergent to wipe down the windshield. You can use dish washing liquid as your mild detergent.
Step 2 – Choose an Abrasive Cleanser for Scrubbing
Rain X has a silicon bonding agent in its formula. Therefore, wiping the windshield down with soap and water only will not do the job. The silicon acts as a water repellent. As such, the film will not break by using step 1 alone. You will now need to use a wet sponge and apply a course or abrasive cleanser that has some scrubbing power. Be sure to choose a cleanser that is powerful enough to scrub, but gentle enough not to leave any scratches on the windshield’s surface.
Step 3 – Test a Small Area First
Start the scrubbing process by testing a small area to the windshield’s extreme corner. Do not put the cleanser directly on the windshield. Instead, ensure that you apply the cleanser to the wet sponge as outlined in step 2. Gently scrub the spot in a circular motion. Check to make sure that there are no scratches as you go along. This is a good way to see whether or not your cleanser has the right amount of abrasion. If you see scratches, the cleanser is too harsh. If you don’t see any scratches, then you are good to go ahead. Use this cleanser for the rest of the film removal process.
Step 4 – Scrub the Entire Windshield
After you’ve completed the test and ensured that you are using the right type of cleanser for scrubbing, you can now move on to scrubbing the entire windshield. Scrub the windshield completely from one side to the other. Use your wet sponge and cleanser. You should keep the sponge very wet at all times throughout the cleansing. This is a precautionary method to avoid leaving scratches and marks on the windshield. If you are not sure how to clean car windshields and windows, take a quick look at the blog that we have on the proper way to do so.
Step 5 – Thoroughly Rinse the Windshield
When you’ve completed scrubbing the windshield, rinse it thoroughly. You can use a hose or bucket of water and your sponge. Gently wipe away the cleanser as you rinse the windshield. It is best to use cold water for the rinsing. After rinsing, dry the windshield and take a good look to see if all the Rain X film has been removed.
Here’s a video on this topic:
Tip: If any of the steps need to be repeated throughout the film removal process described in the steps above, it is OK to repeat them. Just ensure that you are not leaving any scratches along the way.
Professional Help for Proper Car Maintenance
Now you know how to remove Rain X film from your windshield. You may realize just how simple it can be to do a little car detailing yourself to keep your car well maintained. However, do not forget to get some help from professional car detailing experts for larger projects and more specialized attention and maintenance. It is important that professional maintenance work is done on your car incrementally, for longer lasting results and excellent quality preservation. If you’d like to know the range of specialized services and detailing that professional car detailing experts can offer, call and schedule an appointment with an expert near you.
Enjoyed this post? Sign up for our newsletter to receive more valuable tips, ideas, coupons, and extras!


