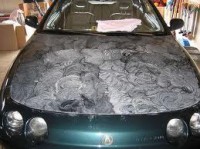
Car paint swirls, when unattended, can lead to lasting damages on your vehicle. This is why you should address this issue as soon as you can. How do you remove car paint swirls?
Below are two steps.
2 Steps to Remove Car Paint Swirls
Most paint cleaners come in different abrasive levels. They are sometimes referred to as polishes. On the other hand, there are some paint cleaners that are non-abrasive. Some people refer to paint cleaners as those that use chemicals to clean while polishes are those that use abrasives to polish.
In any case, if you are using an abrasive product to remove swirls, it is advisable to use a technique of only rubbing the product in a certain direction to keep all of your scratches in the same direction. A non-abrasive product, on the other hand, does not create any scratches onto the finish so it shouldn’t matter which direction you go.
There are some paint cleaners that no longer need to dry before having them removed. So, it is important to check first if it needs to be dried or not. This will prevent you from wasting your valuable time and obtain optimum results at the same time.
If you are using a paint cleaner, always start with the least abrasive one. If that does not remove the swirls then move on to the next level of abrasiveness available. Keep in mind not to start from the most abrasive and then work down. This is simply illogical and a complete waste of resources.
1. Polishing
Polishing is what takes the swirls out. Now remember that the polish you are going to use is not a product you temporarily apply which you will then simply wipe off later. That is a total waste of time and money. The technique is to work the polish into the paint so that the abrasives can break down. When using a fairly abrasive polish, a lighter abrasive polish should be used afterwards to remove the “hazing” that is left by the more abrasive polish.
Polishing gives a smooth feel and deep shine on your vehicle. Remember not to use too much polish when removing swirls. Too much, especially the abrasive ones, can leave a hazing effect on your paint. If the abrasives are not broken down, the swirls will not go away by simply putting more. The haze will especially become noticeable on dark colored vehicles. Use clean, soft, premium quality microfiber or 100% cotton towel in removing any excess polish on the vehicle.
Here are three things to keep in mind when polishing your vehicle:
- Polish after cleaning your vehicle and just before waxing.
- Only polish once or twice a year, or else, this can be a source of further swirl marks.
- Good polishing technique is to work the product into the paint to break down the abrasives well.
This of course is if you are using your hands to remove the swirls. If unsuccessful, consider using a machine polisher. The secret to removing swirls by hand lies in the technique being used. In order to remove swirls by hand a little bit of paint needs to be removed first.
2. Waxing
The polishing step has restored clarity, depth, reflectivity, richness of color and brilliant gloss. Now it’s time to wax your vehicle.
When waxing, remember that less is always more. Apply a little at a time and make sure that it goes a long way. It is important to try and apply a uniform, thin coating. Unlike paint cleaners and polishes, waxes need to be dried first before removing them. Again, checking the product’s directions for use will help optimize your results.
These are simple tips on removing swirls on your car. When attempting to use a machine to clean and polish, remember that this needs to be performed by a skilled and experienced professional. If you are unsure of what to do, it is always wise to consult professional detailing service providers and ask them for their opinion.
Enjoyed this post? Sign up for our newsletter to receive more valuable tips, ideas, coupons, and extras!


