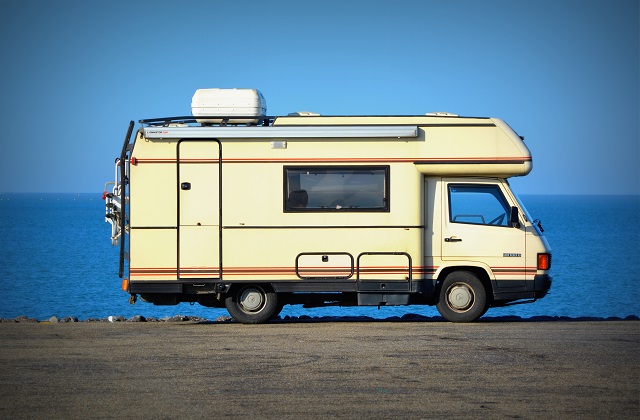
Vacationing in an RV creates bonding family trips during the warm months. The whole family joins together to enjoy the experience. However, a long ride leaves behind a mess on both the exterior and interior of the vehicle. Cleaning an RV takes hard work, but here are some tips to help you tackle the task with ease.
Choosing Materials for Cleaning an RV
Make sure you have the right tools to wash the RV thoroughly. The exterior requires similar items that you use to wash your car. Don’t forget a brush with an extension pole though! This will help you scrub the hard-to-reach places. A ladder is a necessity as well, because you will be starting from the roof when you begin washing the exterior.
The routine for washing the interior of your RV follows the same process as when you clean your home. You will need window cleaner, towels, a vacuum or broom and dustpan, multi-surface cleaner, and bathroom supplies. The inside resembles a living area, meaning you need to clean it similarly.
Cleaning an RV Starts from the Exterior
Scrubbing
As with washing any vehicle, begin from the top and work your way down. This is when you will need to use the ladder and long brush. Clean the roof by sections, soaping down each one and rinsing it before moving on.
Work your way down to the sides of the RV, using the brush to wash sections as well. Similar to the roof, complete the wash and rinse individual sections. However, this process cleans the entire vehicle, starting on one side and completing the front, opposite side, and back.
Don’t forget the awning when cleaning an RV! The best way to tackle this piece of the vehicle – lay it flat against the side. This will ensure you are able to reach the top of the awning when you wash it. The tires should be scrubbed clean as well.
Window Wash
Save the windows as the last part of the exterior wash. That way, you can spray down the outside of the glass and work your way to the interior. Once you finish, you can begin cleaning the inside of the RV.
Cleaning an RV – the Interior
Start with a Clean Slate
First things first, empty out your cabinets. On long trips, you stock up on food and supplies. However, if you’re trying to clean everything out, the items will be in the way. Once the stuff is cleared out, start from the top of the vehicle.
When Cleaning an RV Work from Top to Bottom
Grab the duster and start cleaning. The best place to start is with the ceiling fans and vents. That way any dust that falls will be cleaned up as you work your way down. Use a broom to wipe any cobwebs away.
Wipe down any surfaces with Clorox wipes to sanitize the areas. This will also pick up any dirt or debris that fell from the ceilings. Make sure you wipe down counters, tables, sinks, and the cabinets inside and out.
Bathroom Sanitation
Clorox wipes can be used to eliminate dirt and germs from all bathroom surfaces including the counters, walls, and sink. Scrub the toilet using wipes or bathroom cleaner. Finish the process by spraying off the tank with the hose.
Finally, clean the shower and floors. Use either Clorox wipes or multi-surface cleaner to spray down all the walls. Wipe these down with a towel if you use the spray. Follow the same method for the bathroom floors but use the hose to wash away any remaining solutions.
Tackling the Floors
The final step in cleaning an RV – floors. Starting from the top and working your way down means all the debris falls to the floor. Using either a vacuum or broom (depending on your floors), clear away all the dirt. However, if you have hardwood floors and use a broom, you might want to mop as well. With carpet, you can vacuum to eliminate most of the contaminants.
Conclusion
Cleaning an RV is a long, time-consuming process. Don’t want to tackle the task yourself? Simply call us and our highly-trained professionals will take care of your RV for you and leave you one less thing to worry about! Schedule an appointment today.
Enjoyed this post? Sign up for our newsletter to receive more valuable tips, ideas, coupons, and extras!


